


When an object like this square is placed the text meets the edges of the square, to ensure there is space around it 'text wrap' can be used.....


Increasing the values of spacing above, below, to the right and left of the object will adjust the spacing between the text and the object.

....a 4mm gap between the object and the text.

inserting 'pull quote text' in the same way and again changing the values to adjust the spacing....


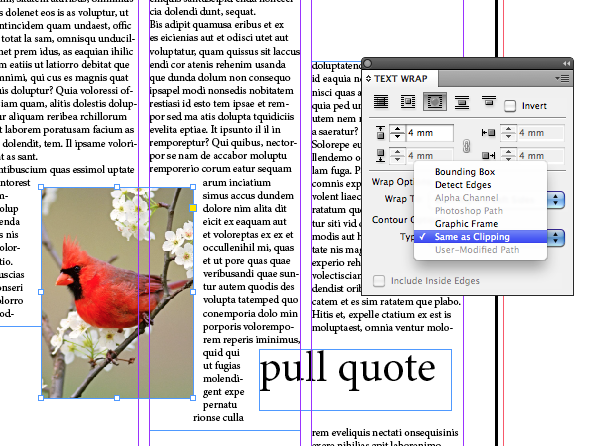
And the same can be achieved with imagery.....

We were then given the task of replicating an article we were given, using the skills we had acquired on InDesign......

I attempted to set the page up in the following way, however, my values for the margins were not correct so I could not open it!

.... changed the values, which then allowed me to open the document so I could then correct the values with a little help from Mike.


The new values for the margins.

Inserting the title.

Positioning the box using the 'X' and 'Y' co-ordinates.

Creating the red gutter inserting the 'width' and 'height' measurements.

Inserting the CMYK values to get the correct colour for the red gutter.

Creating a box for the page number.

Placing the red box using the 'X' and 'Y' co-ordinates.


Incorporating text and an image.

I gave the image a transparent background and used the 'Alpha Channel' contour option to allow the text to flow around the lines of the imagery.

Incorporating more text.


The 'Text Frame Options' allow text to be positioned accurately within a text box.

Adding the bottom imagery and text.

Viewing the spread working on.

Using the layer blending options.
No comments:
Post a Comment